I have mentioned and linked many times to PicMonkeyPicMonkey for taking my images and personalizing them to make them your own. I am not a techie person, and I know it can be so confusing when trying to use new programs, so in an effort to make your DIY life easier, I present an easy tutorial with pictures, non-tech language, and lots of personalization love. Get ready to rock your world!!
DIY Printables: Easy Tutorial and Tips!
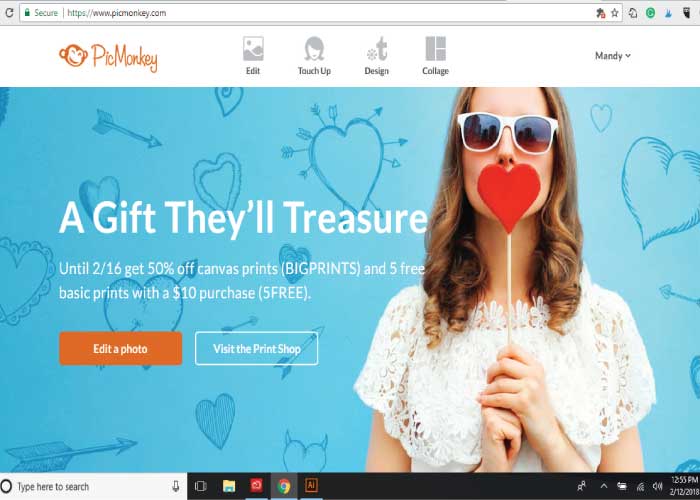 Step 1: Start here on the main page. It may have a different picture when you are looking at it, because, well, holidays. Click on “Edit a Photo” right there in the orangey-brown box. (See we aren’t techie at all here!! But, I did come up with that color all on my own.)
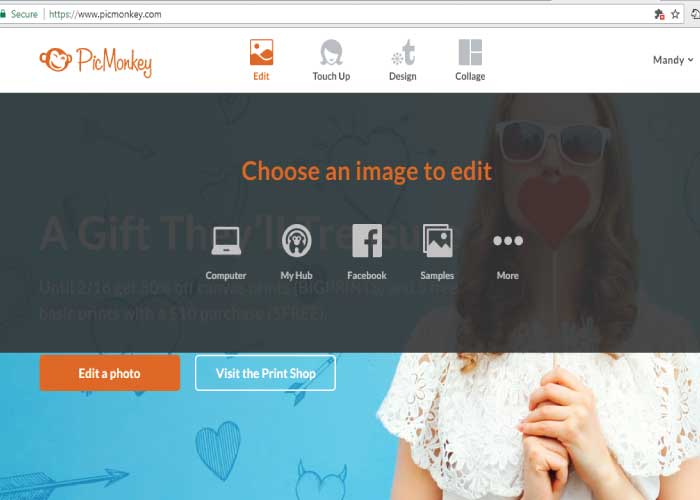
Step 2: Once you have clicked on the orangy-brown box, a dark grey box will pop up with all of these lovely options. You want to click on the “computer” option because that is where you saved the printables you want to edit. HINT: If you have a .pdf you will first need to save it as a .jpg!
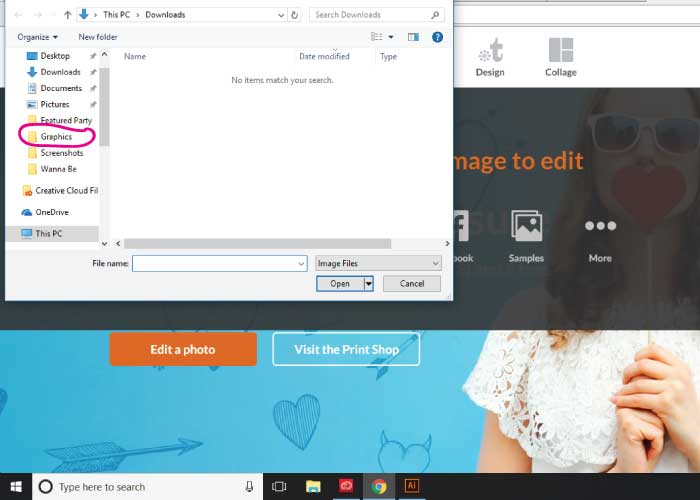
Step 3: Click on the file where you saved your printables. I saved mine in the graphics folder in my pictures folder. I clicked on “graphics” then when the file names popped up I found the file that I wanted, then clicked the “open” button in the lower right corner by the “cancel button”.
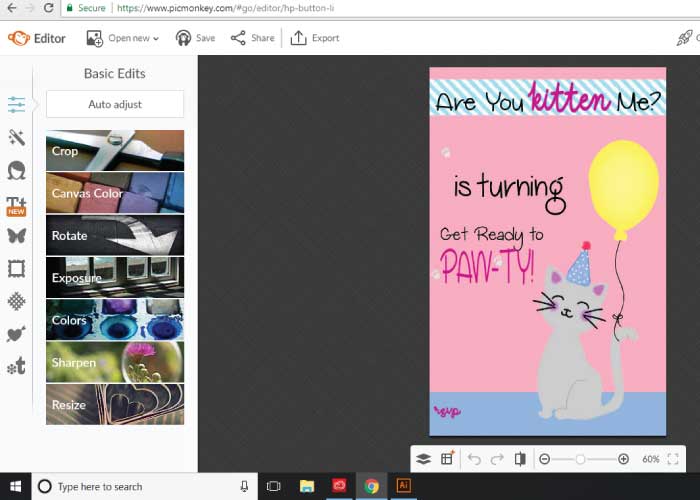
Step 4: Once you click that “open” button from step 3, the file that you chose will pop up to the workspace. It is now ready for personalization!
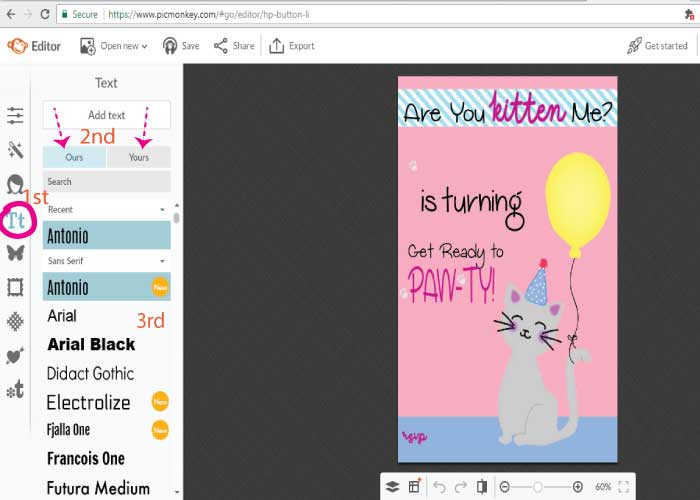
Step 5: At this point, you will choose your text. As you can see in the picture above, 1st click on the “Tt” Then you can either choose from PicMonkey’s text styles or your own that you have on your computer. You can toggle back and forth until you choose. Finally, click on your chosen text.
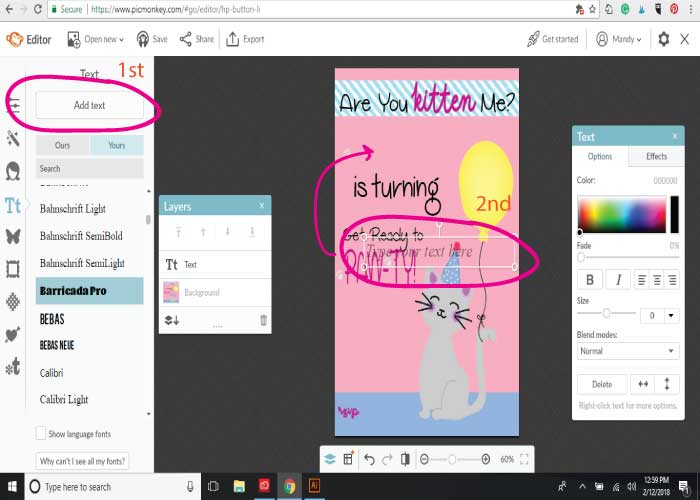
Step 6: Once you decide which type of text you’d like, click on the “Add Text” button in the upper left. When you do that a box will appear on your image. Hover your cursor over the box and right click, then move your mouse to move the box into the position you want it.
Don’t worry if you don’t know exactly where you want your text, you can adjust it later.
Also, if you look to the right of my photo, you’ll see the box where you can change size, color, etc.
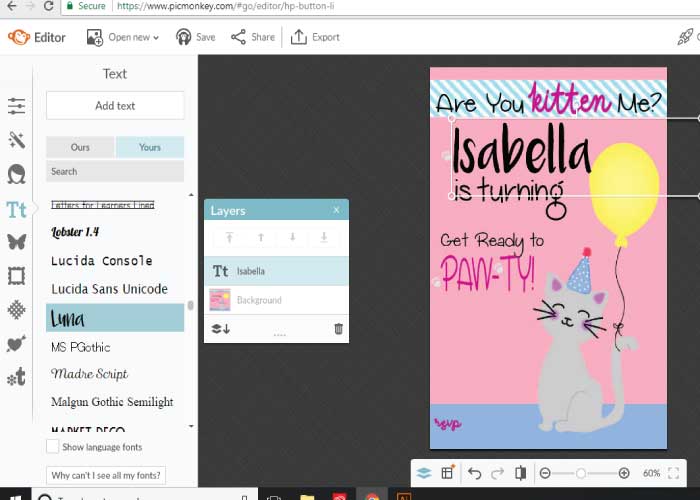
Step 7: Fill in the name that you want for the printable. I chose Isabella. Then you can use the corners of the box to make it bigger or smaller (just click on one of the corner dots and hold it down as you move it out and in). You can also move the box around like I explained in step 6.
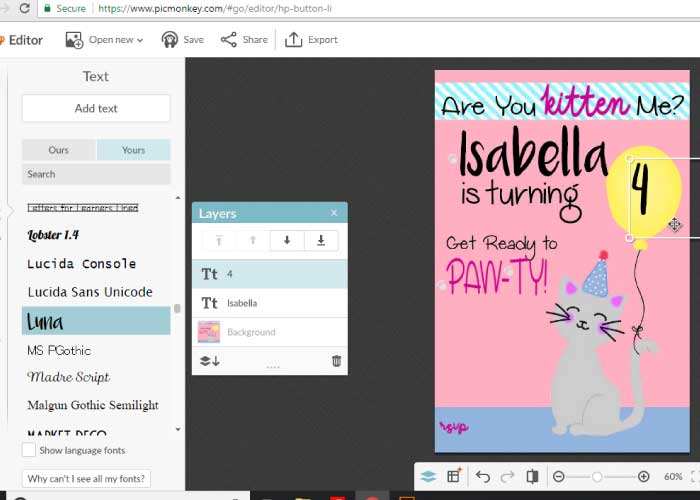
Step 8: When you are satisfied with your first text box, move on and continue to fill in the portions that you want to be personalized repeating the steps above.
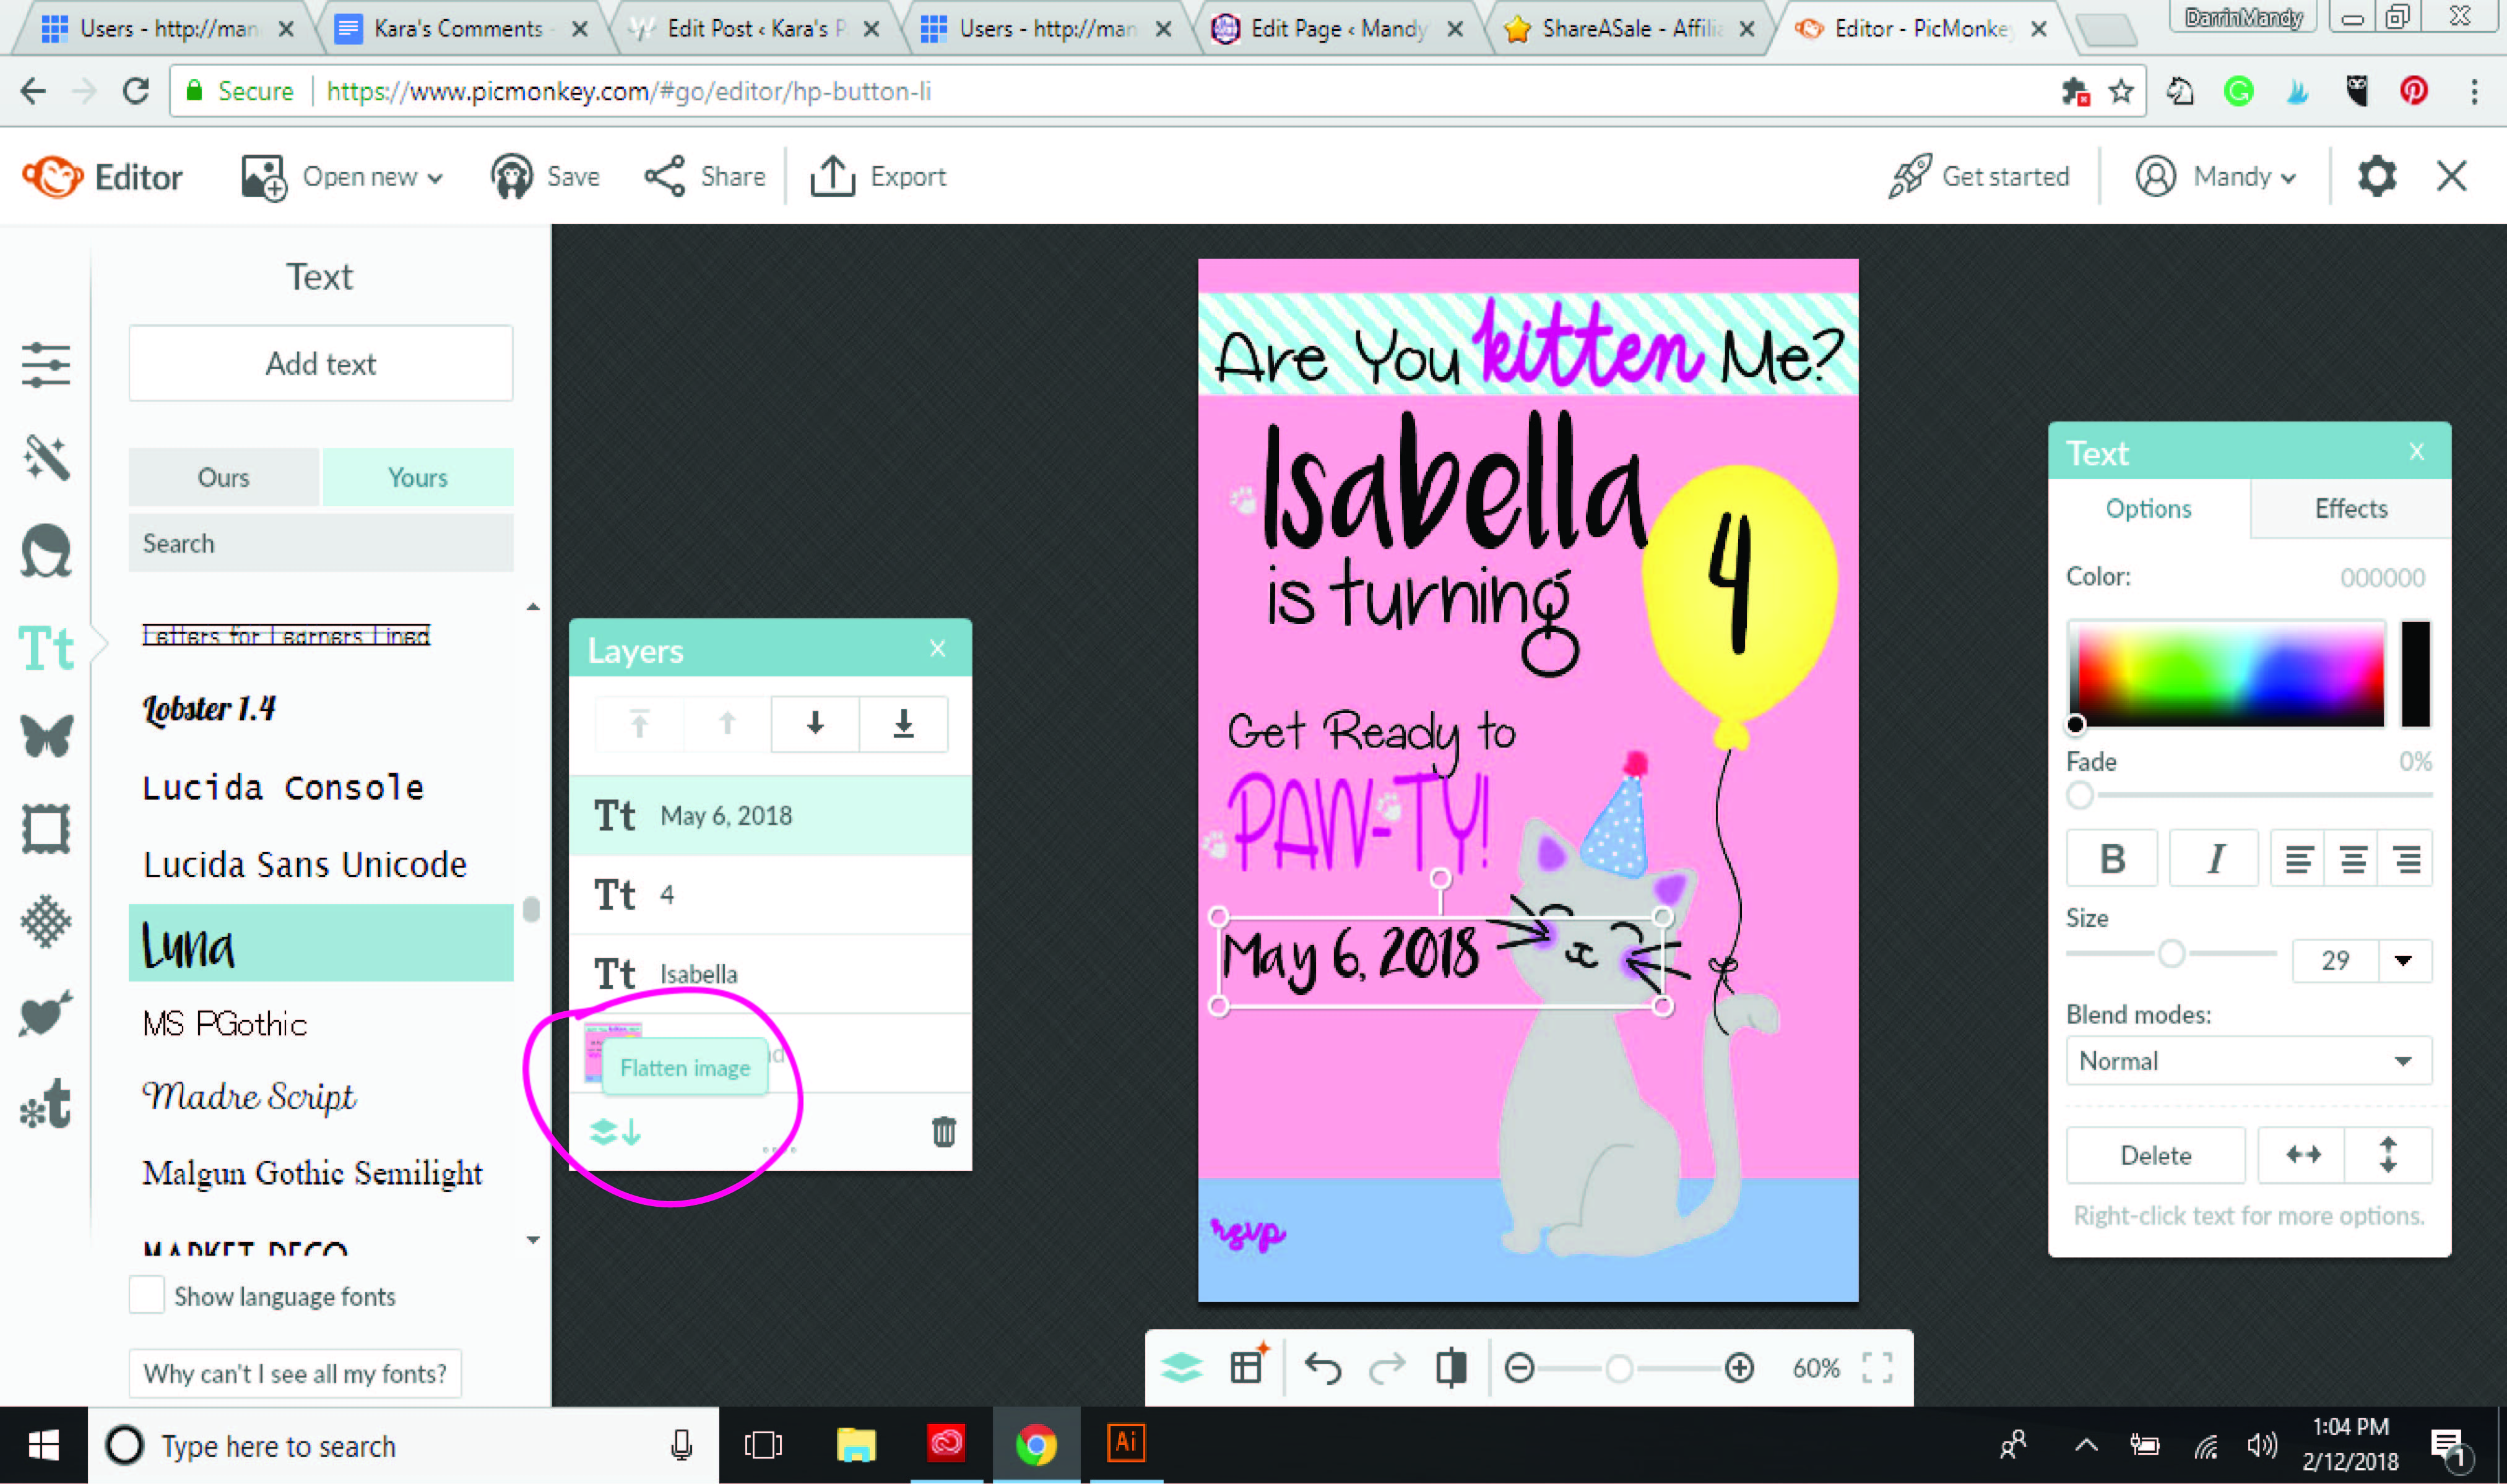
Step 9: Once you have all of the text and personalization that you would like, you can flatten your image, meaning you combine all of the layers together, by clicking on the flatten image icon that I have circled on this screen.
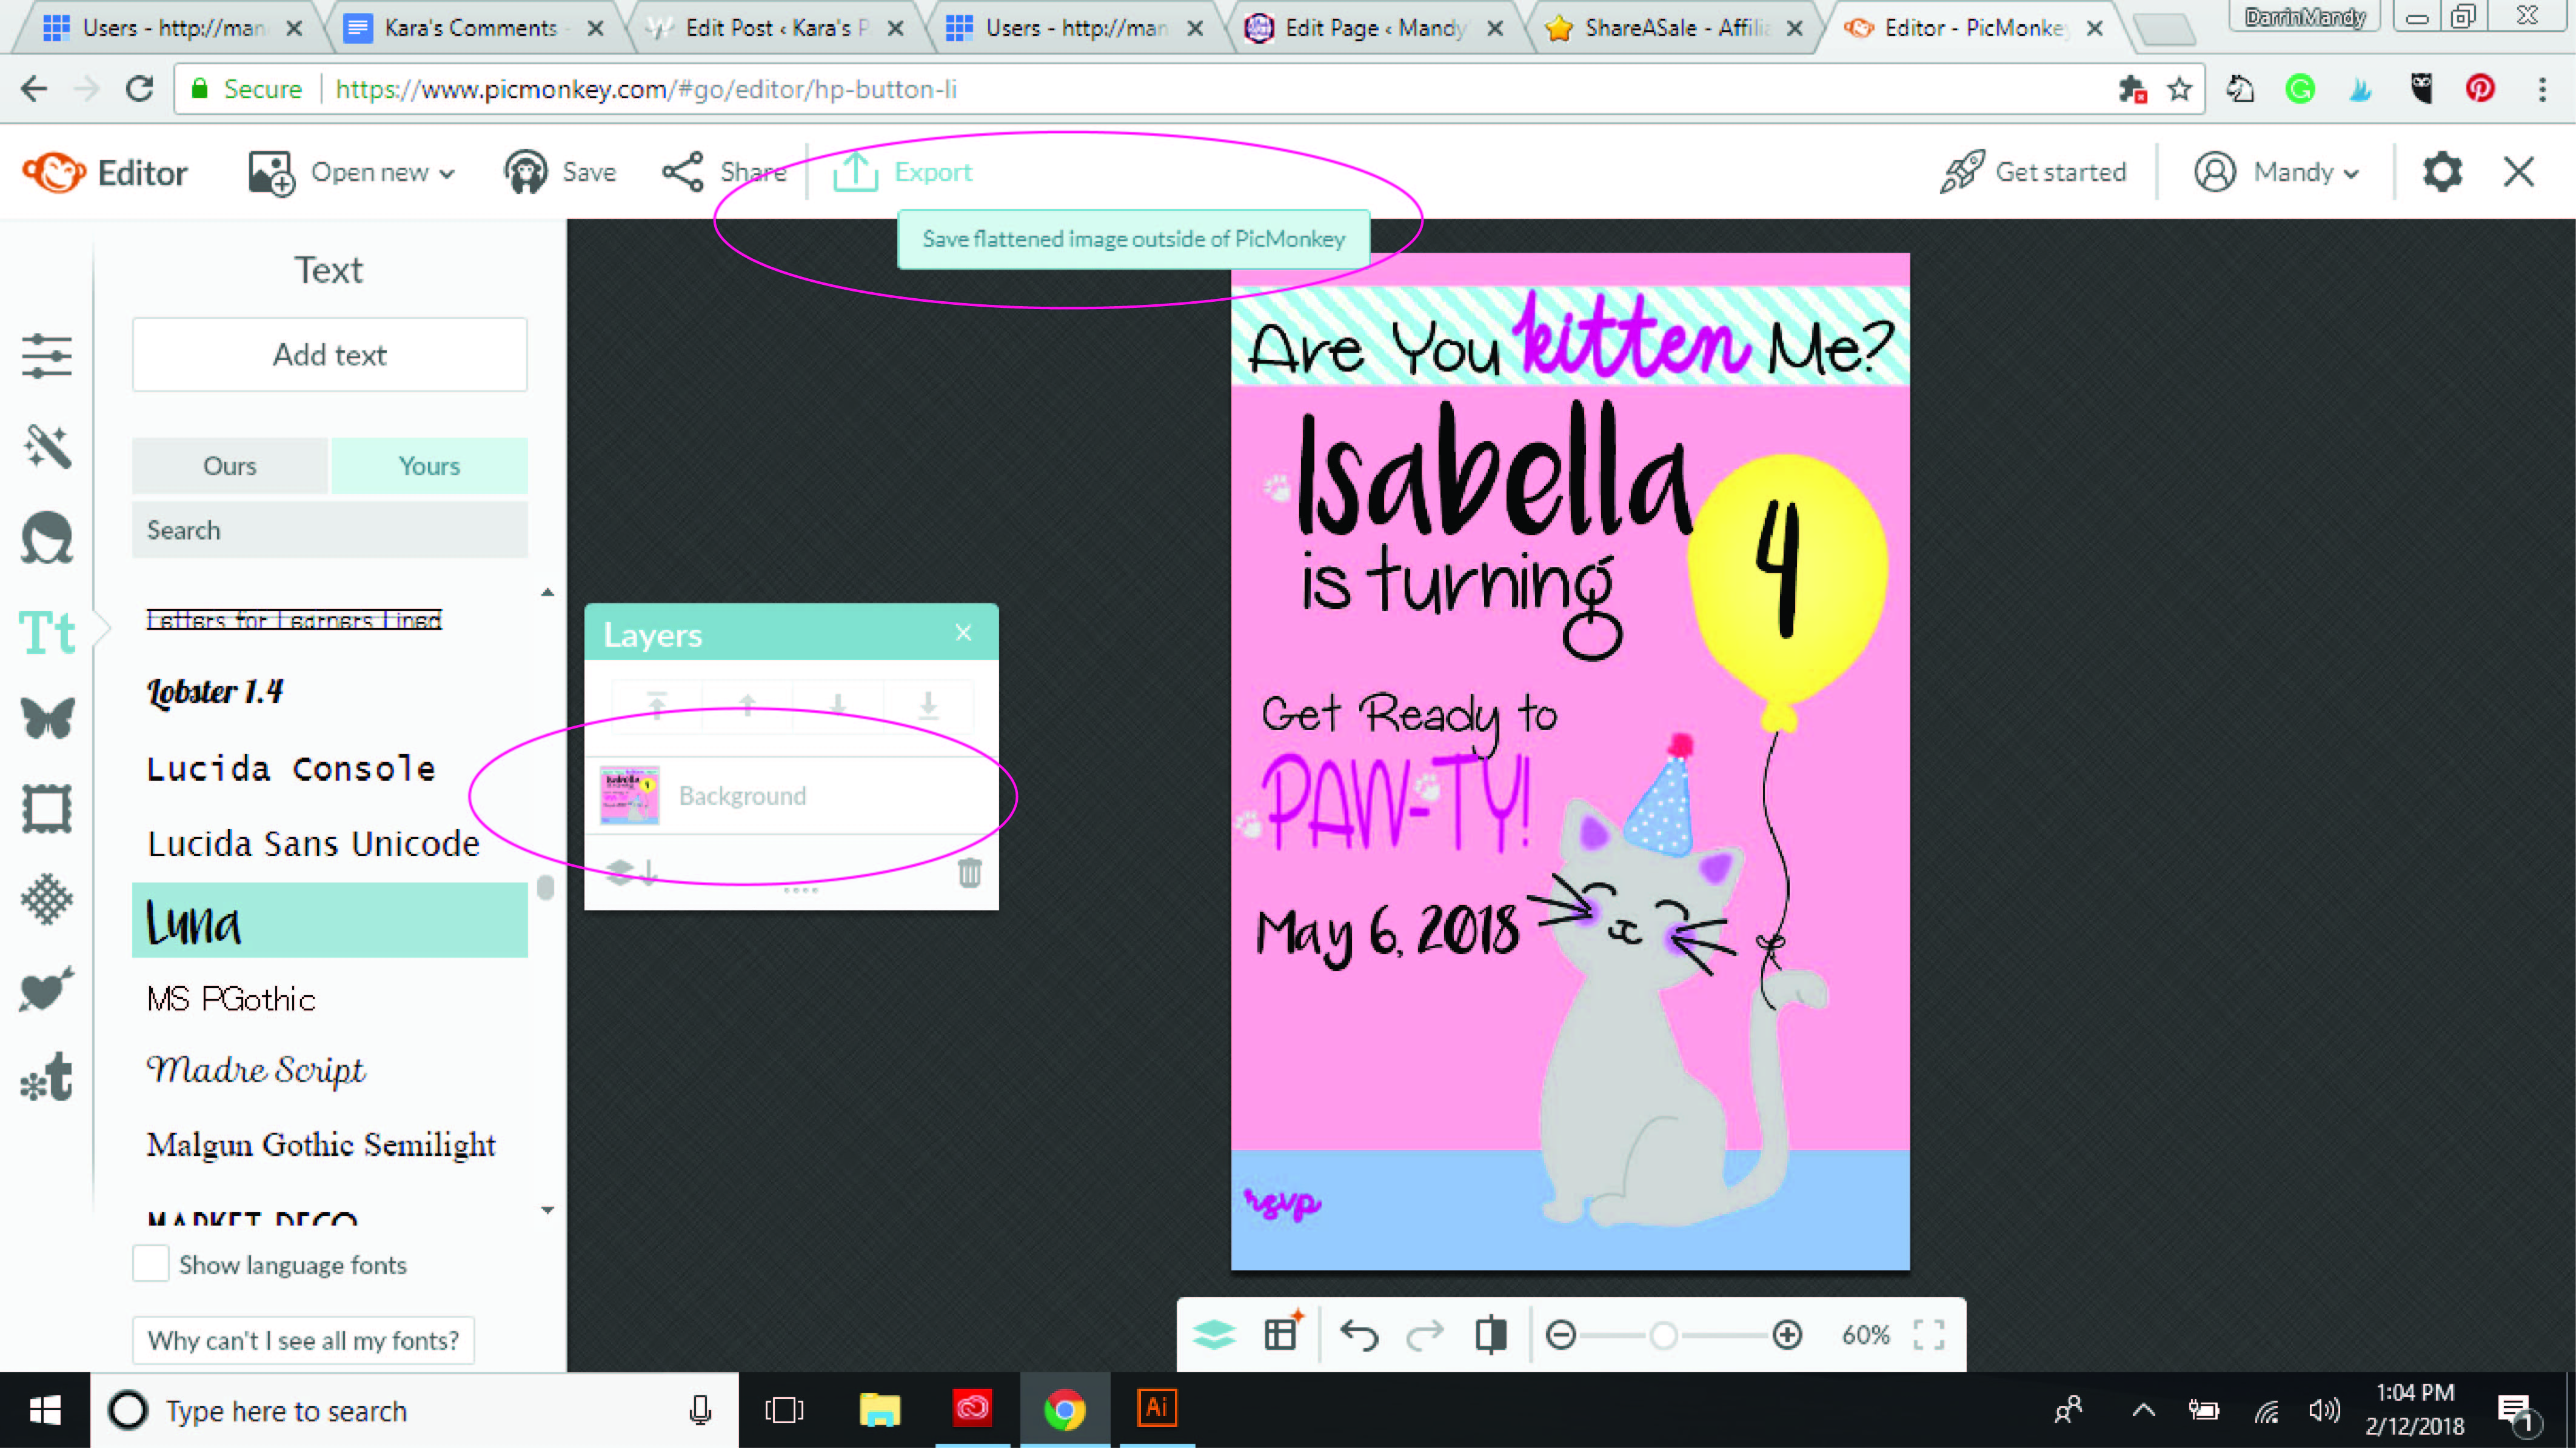
Step 10: As you can see in the Layers box, after you flatten, you have one “Background” layer now. You can now export your personalized invitation to your computer to send out to be printed or to print from home. Just click on the Export icon that is circled on the upper part of the screen.

Step 11: Once you click on Export, these boxes will pop up. You can change your image name and the type of image, the quality of the image, and the dimensions, but you don’t have to change anything if you don’t want to. Then, you can click on the green box to export to your computer. You can also use the green arrow button next to Export for computer to choose other options if need be.
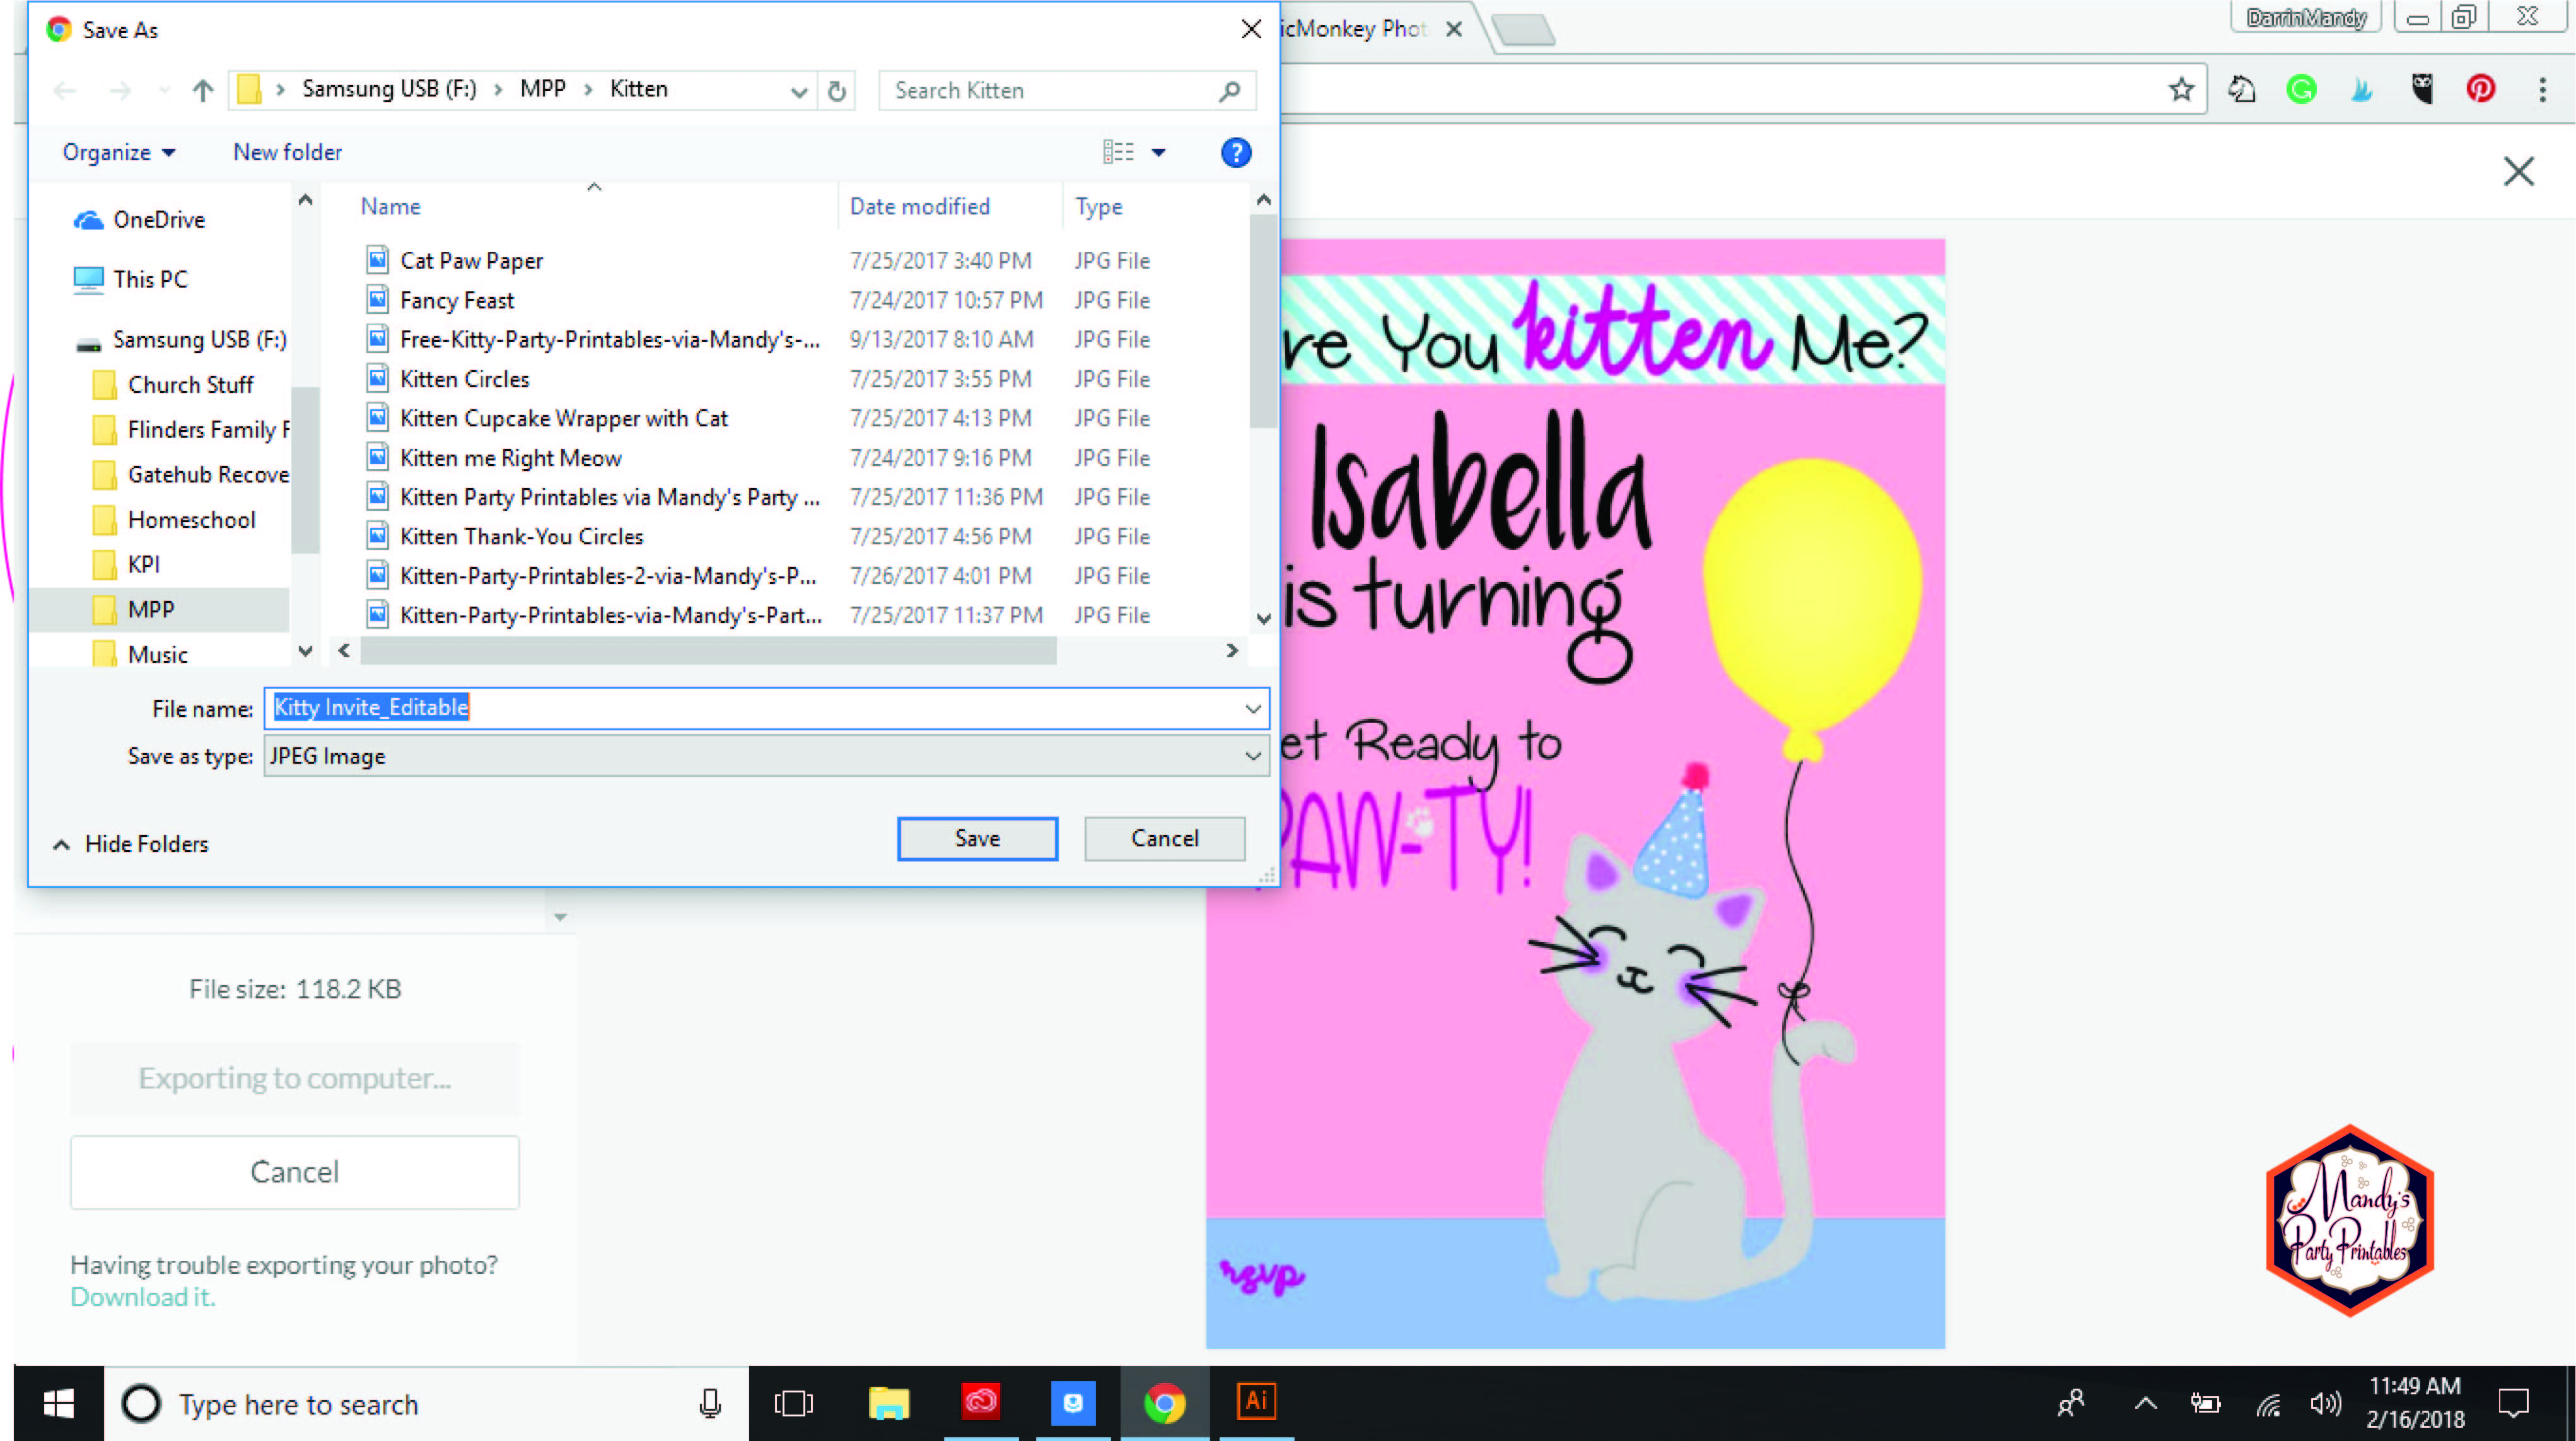
Step 12: Once you click that green button to save to your computer, this box will pop up. It will be the last place that you chose a file from. If you want to save your new creation to the same folder that you chose the original editable image from, just enter a new file name (it’s highlighted in blue) and then hit save. If you want to save it elsewhere, just navigate to the correct folder.
And, you are done! Now that you have done it once, it gets easier and easier. PicMonkey is super user-friendly, and you can explore and play around with all of the options they have available. That is how you learn!
If you have any questions at all, I am here to help! Just leave me a comment!
Here is a link to the Kitty Cat Party Printables that I used for this tutorial.
Don’t forget to follow us on Facebook, Pinterest, Twitter, and Instagram for all the latest buzz. “Life’s a party, frame it with printables!”
![]()
This post contains affiliate links. It doesn’t cost you anything to use them!