
When people come to your house, what is the first thing they see? Your doormat! While most are pretty standard—welcome—there is a new trend that is pushing doormats with more personality. If you want a doormat that reflects your personality, a great option is to make one!
Thankfully, it’s not difficult. In fact, it’s pretty simple! Simply Self Storage put together a tutorial that walks you through each step. you can do just that! It also provides 11 printable stencils that you can print and use.
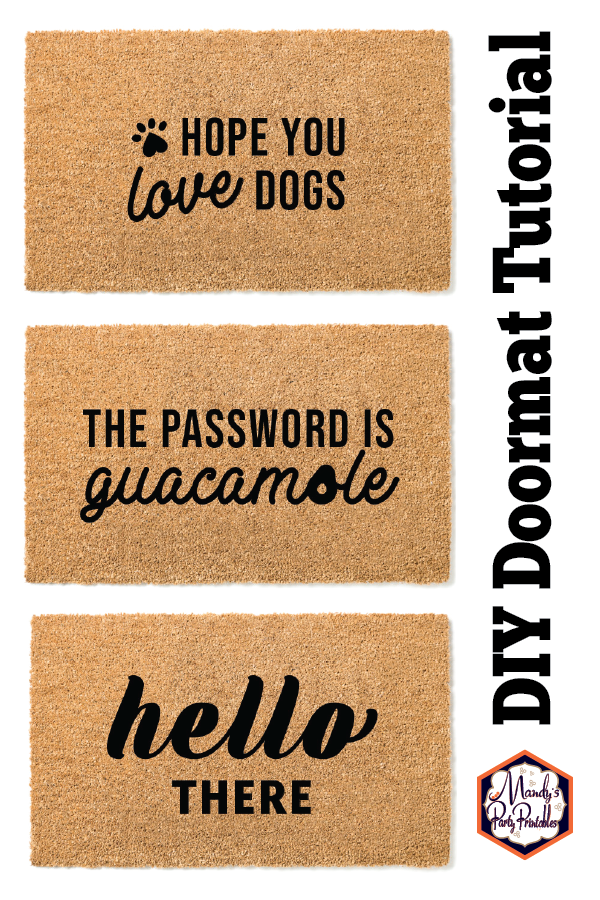
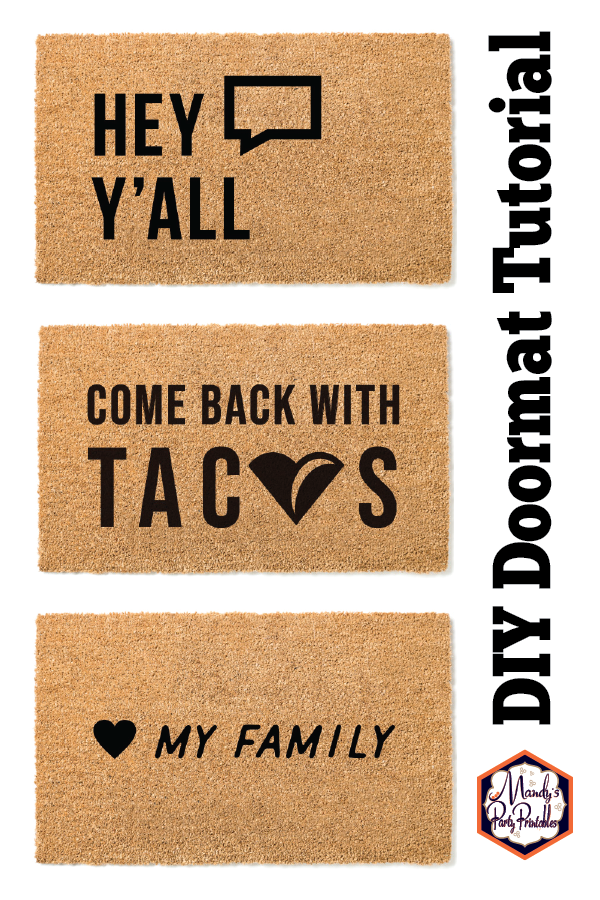
There are a range of options, ones that showcase a love of family and ones that might make your guests chuckle. There are mats for wine lovers, dog lovers, tacos lovers, shoe lovers and those that just love their family.
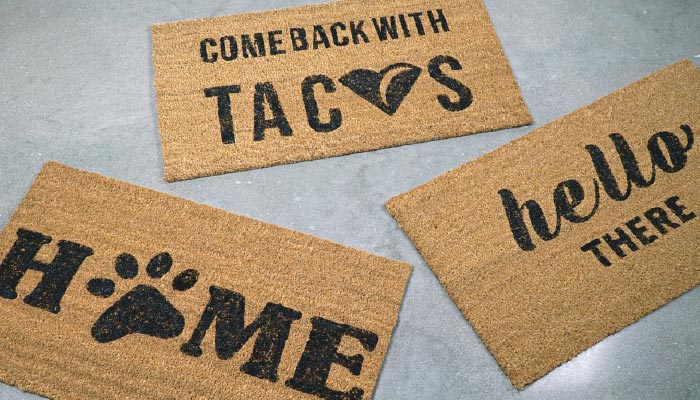
One of the highlights is the “Come Back With Tacos” design. It’s cheeky, modern and encourages your guests to bring you tacos! What’s not to love? Pick the one that strikes your fancy and print it out. Then follow the step by step instructions below.
Follow the steps below to make your own DIY doormat!
D
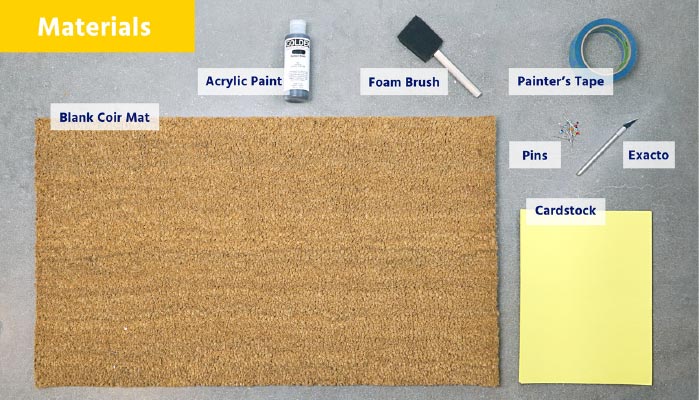
Materials:
Steps
- Pick a Design and Print
Pick one of the printables and print it out on printer-safe cardstock.
- Tape Your Mat Securely
Cover your mat in painter’s tape. Be sure that you aren’t leaving any gaps between the tape. You will also want to ensure that it’s sticking to your mat quite well. If you need to, pat it down until it’s sticking well.
- Arrange the Stencil on Your Mat
Lay your stencils down on the mat in layout that you’d like. Make sure that they are straight and then pin them down.
- Cut Out Your Design—CAREFULLY
Using an exacto knife, carefully cut out your design. Take extra time around any curved edges or thin lines. Pin down any pieces that might now be “floating” inside the design.
- Paint Several Coats
Using your paint dabber and acrylic paint, dab several coats of paint onto the stencils. Resist the urge to push to hard, or it might bleed underneath the stencil.
- Let Dry and Reveal Your Design
Now just let it dry for a few hours, then remove the tape to reveal your design!
Enjoy Your Doormat!
Watch your guests faces light up when they see your doormat!
See this DIY Pushpin Travel Map Tutorial
Don’t forget to follow us on Facebook, Pinterest, Twitter, and Instagram
for all the latest buzz.
![]()